

Ready-to-Pour Acrylics: Mont Marte Pouring Sets and Medium

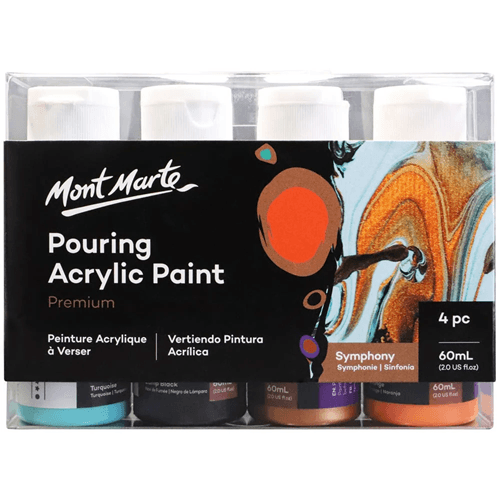
Fluid art looks magical, but mixing paint to the right pouring consistency takes practice. Pouring acrylic paint that comes ready to pour lets you skip the mixing and start straight away. This Haanz Art Guide explains the Mont Marte pouring sets, metallic pouring colours and pouring medium we stock, and how to choose between them.
Mont Marte Premium pouring sets, 4 x 60ml
Each set has four 60ml bottles of ready-to-pour paint in a coordinated colour combination, chosen to work together. The colours are pre-mixed to a pouring consistency, so you can start creating flowing fluid art right away. We stock these combinations:
Because the colours are planned as a set, you don’t have to worry about muddy combinations. Pick the set whose colours you like and pour.
Metallic pouring paint, 120ml
Mont Marte Pouring Acrylic Paint 120ml is a ready-to-pour metallic acrylic in Gold or Silver. Add it to any pour for metallic veins, cells and highlights, with no mixing required.
Mont Marte Acrylic Pouring Medium, 240ml
Mont Marte Acrylic Pouring Medium 240ml is for mixing your own pouring paint from regular acrylics. Mix it with tube or bottle acrylics to make them flow smoothly. This is the most flexible option if you already own lots of acrylic colours.
See all in Pouring Acrylics. Prices change, so see each product page for today’s price.
Which should you choose?
- First time pouring: a Premium 4 x 60ml set. Everything is ready and the colours match.
- You want metallic effects: add a 120ml Gold or Silver to any set.
- You already have acrylic paints: pouring medium lets you turn them into pouring paint.
- Large canvases: pouring medium plus large bottles of acrylic, because big pours use a lot of paint.
A simple “dirty pour”
- Protect your table with plastic and raise the canvas on cups so paint can run off the edges.
- Layer colours in one cup: pour each colour gently down the side of a cup, one on top of another. Add a little metallic for highlights.
- Flip the cup onto the canvas, wait a few seconds, then lift it.
- Tilt the canvas slowly so paint flows to the edges and covers the surface.
- Leave it flat to dry in a dust-free place. Thick pours can take a day or more.
For more techniques such as swipes, puddle pours and making cells, read Acrylic Pouring for Beginners.
Tips for clean, bright pours
- Don’t overmix in the cup, or colours turn muddy.
- Use a white or light base layer to keep colours bright.
- Keep the room warm and still; strong fans make paint skin over unevenly.
- Pour onto a primed canvas, board or tiles.
- Wear gloves and old clothes; pouring is messy.
Common problems and fixes
- Colours turned muddy: too much mixing or tilting. Tilt less and stop once the canvas is covered.
- Paint cracked as it dried: the layer was very thick or dried too fast. Pour a little thinner and dry in a cool, still room.
- Bare corners: tilt toward the corners or use a gloved finger to guide paint to the edges.
- Dust in the surface: cover drying pieces with a clean box.
Beyond canvas
Pouring paint also works on coasters, tiles, wooden boards, vases and phone covers. Seal finished pieces with a varnish suitable for acrylic. See How to Varnish an Acrylic Painting.
Frequently asked questions
How much paint do I need?
It depends on the canvas size and how thick you pour. Pours run off the edges, so plan for more paint than the canvas area suggests, and keep pouring medium handy to mix extra.
Can I mix the set colours with my own pouring paint?
Yes. They are acrylics and mix together. Test the consistency so all colours flow similarly.
Do you deliver islandwide?
Yes. We deliver across Sri Lanka in 2–5 working days, with cash on delivery, card or bank transfer. You can also visit our shops in Boralesgamuwa and Horana, open every day from 9 AM to 6 PM.
Not sure what to choose? WhatsApp the Haanz team on 0711 515 515 and we’ll help you choose pouring paints.
More Haanz Art Guides
 Oil Painting Brushes: Bristle, Sable and Synthetic ExplainedRead the guide →
 How to Stop Smudging Your Drawings: Gloves, Fixative and TipsRead the guide →
 Perspective Drawing Basics: One-Point and Two-Point PerspectiveRead the guide →
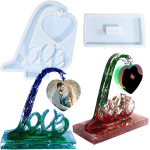 Name, Message and Heart Moulds for Resin GiftsRead the guide →
