

How to Draw Hands: A Beginner’s Guide

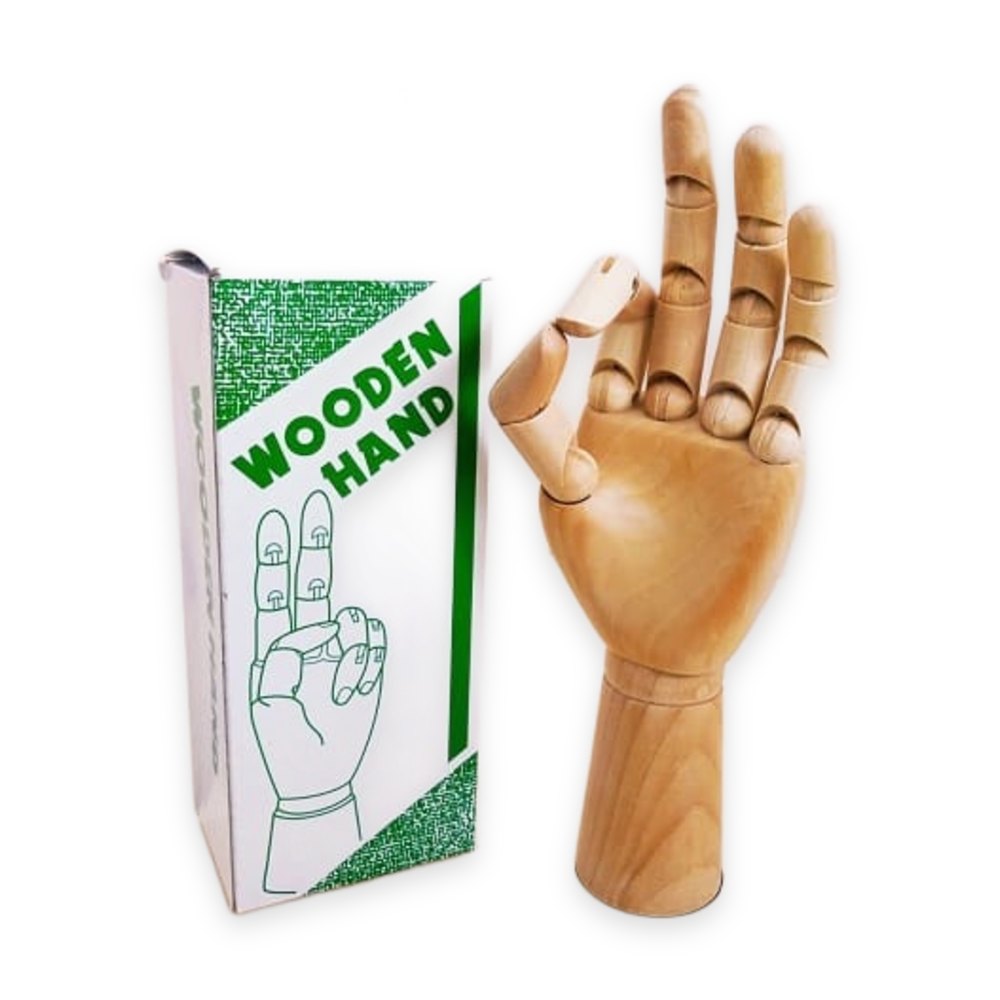
Many beginners hide hands in pockets or behind a back because they feel too hard. The good news is that how to draw hands can be learned with a simple shape method and a little regular practice. This Haanz Art Guide explains how a hand is built, gives you clear steps from basic shapes to shading, and shows how a wooden hand manikin makes practice much easier.
What you need
- A hand model: the Wooden Hand Manikin, 30cm has posable fingers and a display stand, so you can set a pose and draw it for as long as you like. The smaller Wooden Hand Manikin, 20cm fits easily on a study table.
- Pencils: the Camlin Drawing Pencil is sold individually in many grades. Use HB for construction lines and 2B to 4B for shading. The Camlin Drawing Pencil Set, 6 pcs gives you a ready range.
- Paper: a small pad such as the Bomega Sketch Pad A5 is ideal for many quick studies.
- Eraser and blender: a soft Mont Marte Artist Eraser, Small for construction lines, and Art Nation Paper Stumps for smooth shading.
You will find more posable models and studio tools in Other Artists Materials, and single pencils in Drawing Pencils. Prices change, so see each product page for today’s price.
Understand the shape of a hand first
A hand is easier to draw when you see it as a few simple parts instead of five separate fingers.
- The palm is a flat, slightly rounded box. It is roughly as long as the middle finger.
- The fingers each have three sections. The joints line up in gentle curves across the hand, not straight lines.
- The middle finger is the longest. The index and ring fingers are a little shorter, and the little finger ends near the top joint of the ring finger.
- The thumb starts low on the side of the palm, near the wrist, and has a large fleshy pad at its base. It moves in a different direction to the fingers.
How to draw hands step by step
- Pose your model. Bend the fingers of the wooden hand manikin into a simple pose, such as an open hand or a relaxed curl. Place it under a single lamp so the shadows are clear.
- Draw the palm block. With a light HB, draw a box shape for the palm. Tilt it to match the angle of the pose.
- Add the wrist. Draw two short lines for the wrist. It is narrower than the palm.
- Mark the knuckle curve. Draw a soft arc across the top of the palm where the fingers begin. Add two more arcs higher up for the middle and top joints.
- Block in the fingers. Draw each finger as three small cylinders joined at the arcs. Check lengths against the middle finger.
- Place the thumb. Start from the lower side of the palm and draw the thumb pad as an oval, then two cylinder sections.
- Refine the outline. Now round off the shapes into a natural contour. Add small creases at the joints and the lines of the palm, but keep them light.
- Shade. Find where the light comes from. Shade the side away from the light with a 2B, and add darker shadows between the fingers with a 4B. Blend with a paper stump and erase the construction lines.
The wooden manikin shows the structure clearly, but it does not show skin, nails or soft pads. After drawing the manikin, try the same pose with your own non-drawing hand and add these details.
Practice tips for drawing hands
- Do ten quick two-minute sketches a day instead of one long drawing a week.
- Draw the same pose from three angles by turning the manikin.
- Look for negative spaces, the gaps between fingers. They help you check shapes.
- Use a phone photo of a family member’s hands for new poses. Older hands show joints and creases clearly.
- Learn full poses with a figure model. Our Wooden Manikin Figure Drawing guide explains how.
Common mistakes
- Fingers all the same length. Always compare with the middle finger.
- A thumb that starts too high. It joins near the wrist, not halfway up the palm.
- Straight knuckle lines. Joints follow curves.
- Hard outlines and no shading. Shading gives the hand weight and form.
Ready to add hands to a full portrait? Read Portrait Drawing for Beginners and practise shading with Pencil Shading Techniques.
Frequently asked questions
Is a wooden hand manikin useful for beginners?
Yes. It holds a pose for as long as you need, shows the joints clearly, and lets you study angles that are hard to hold with your own hand.
Which size hand manikin should I choose?
The 30cm model is easier to see details on, while the 20cm model takes less space on a small desk. Both have posable fingers and a stand.
Do you deliver islandwide?
Yes. We deliver across Sri Lanka in 2–5 working days, with cash on delivery, card or bank transfer. You can also visit our shops in Boralesgamuwa and Horana, open every day from 9 AM to 6 PM.
Not sure what to choose? Call / WhatsApp the Haanz team on 0711 515 515 and we’ll help you choose a hand manikin, pencils and paper for figure drawing.
More Haanz Art Guides
 Resin Tools and Accessories: What You Really Need to StartRead the guide →
 Air Dry Clay Projects: 8 Easy Ideas for Home and SchoolRead the guide →
 A 30-Day Drawing Practice Plan for BeginnersRead the guide →
 Resin Boxes, Phone Stands and Plant Holders: Home Decor MouldsRead the guide →
