

Watercolour Techniques for Beginners: 8 Exercises to Try

Watercolour behaves differently from every other paint: it flows, spreads and dries lighter than it looks. Learning a handful of basic methods makes it far more predictable and fun. This guide explains eight watercolour techniques for beginners, each with a simple exercise you can do on a small piece of paper in a few minutes.
Before you start
- Use real watercolour paper; thin paper buckles. See our watercolour paper guide.
- Tape the paper to a board with Nyoni Artist Masking Tape so it stays flat and gives a clean white border.
- Keep two water jars: one for rinsing, one clean for mixing.
- Have a tissue or paper towel ready for lifting.
Eight watercolour techniques for beginners
- Flat wash: load a large brush, tilt the board slightly and paint overlapping horizontal strokes from top to bottom, picking up the bead of paint at the bottom of each stroke. Aim for even colour.
- Graded wash: start with strong colour and add a little more water with each stroke, so the colour fades to pale. Great for skies.
- Wet-on-wet: wet the paper with clean water, then drop in colour. It spreads softly with blurred edges, ideal for skies, backgrounds and flowers.
- Wet-on-dry: paint on dry paper for crisp, controlled edges and details.
- Dry brush: use a brush with very little water and paint, and drag it lightly across the paper for broken, textured marks, such as grass, wood or sparkle on water.
- Lifting: press a clean, damp brush or a tissue onto wet paint to lift colour out, for soft clouds and highlights.
- Glazing: once a layer is completely dry, paint a thin transparent layer of another colour over it. The colours mix optically, giving depth.
- Salt texture: sprinkle a few grains of table salt onto a wet wash; as it dries, the salt creates small starry patterns. Brush the salt off when fully dry.
Practice sheet
Divide an A4 sheet of watercolour paper into eight boxes with masking tape and try one technique in each. Label them in pencil. It becomes a handy reference you can look back on before starting a painting.
Materials for watercolour practice
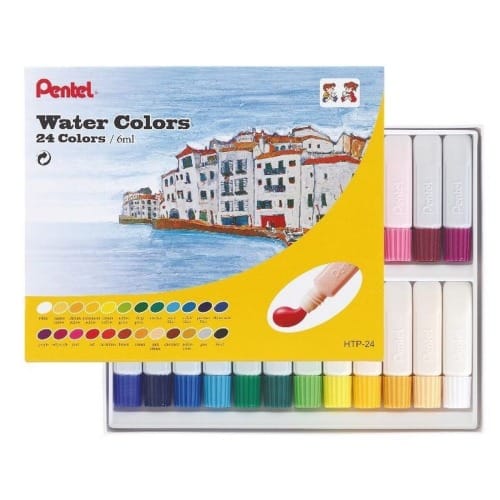
- Paints: Pentel Watercolour 24 tubes or a solid pan set such as Art Nation Solid Watercolour 12. See our watercolour paints guide.
- Paper: the Bomeijia Watercolour Pad A4, 160gsm for practice, or SeaKing Watercolour Paper 160gsm A3.
- Brushes: a medium round brush with a good point, such as an Apple Fine Red Sable size 4, and a larger flat for washes.
- Palette: a Mixing Tray with 14 holes.
Prices change, so see each product page for today’s price. Browse all watercolours and watercolour papers.
Common problems
- Muddy colours: too many colours mixed, or painting into a half-dry layer. Wait until it is fully dry or still very wet.
- Blooms (cauliflower shapes): wetter paint flowing into a drying area. Sometimes they look lovely; to avoid them, keep wetness even.
- Hard edges where you wanted soft ones: work faster, or soften the edge with a damp brush.
- Colours too pale when dry: watercolour dries lighter, so mix a little stronger than you think.
Frequently asked questions
Which technique should I learn first?
Start with the flat and graded wash; they teach you how much water and paint to load.
Do I need masking fluid?
Not to begin. Leaving areas of white paper unpainted, or lifting colour, works for most highlights.
Can I use watercolour pencils for these techniques?
Many of them, yes. See our watercolour pencils guide.
Do you deliver islandwide?
Yes. We deliver across Sri Lanka in 2–5 working days, with cash on delivery, card or bank transfer. You can also visit our shops in Boralesgamuwa and Horana, open every day from 9 AM to 6 PM.
Not sure what to choose? WhatsApp the Haanz team on 0711 515 515 and we’ll help you choose paints, paper and brushes for watercolour.
More Haanz Art Guides
 Study Stationery for Students: Highlighters, Pens and NotebooksRead the guide →
 Craft Knives for Beginners: Cutting Paper, Card and Stencils SafelyRead the guide →
 Pencil Shading Techniques for Beginners: Hatching to BlendingRead the guide →
 Fabriano Accademia Paper Guide: GSM and Sizes ExplainedRead the guide →