

Hatching, Cross-Hatching and Stippling with Fineliners

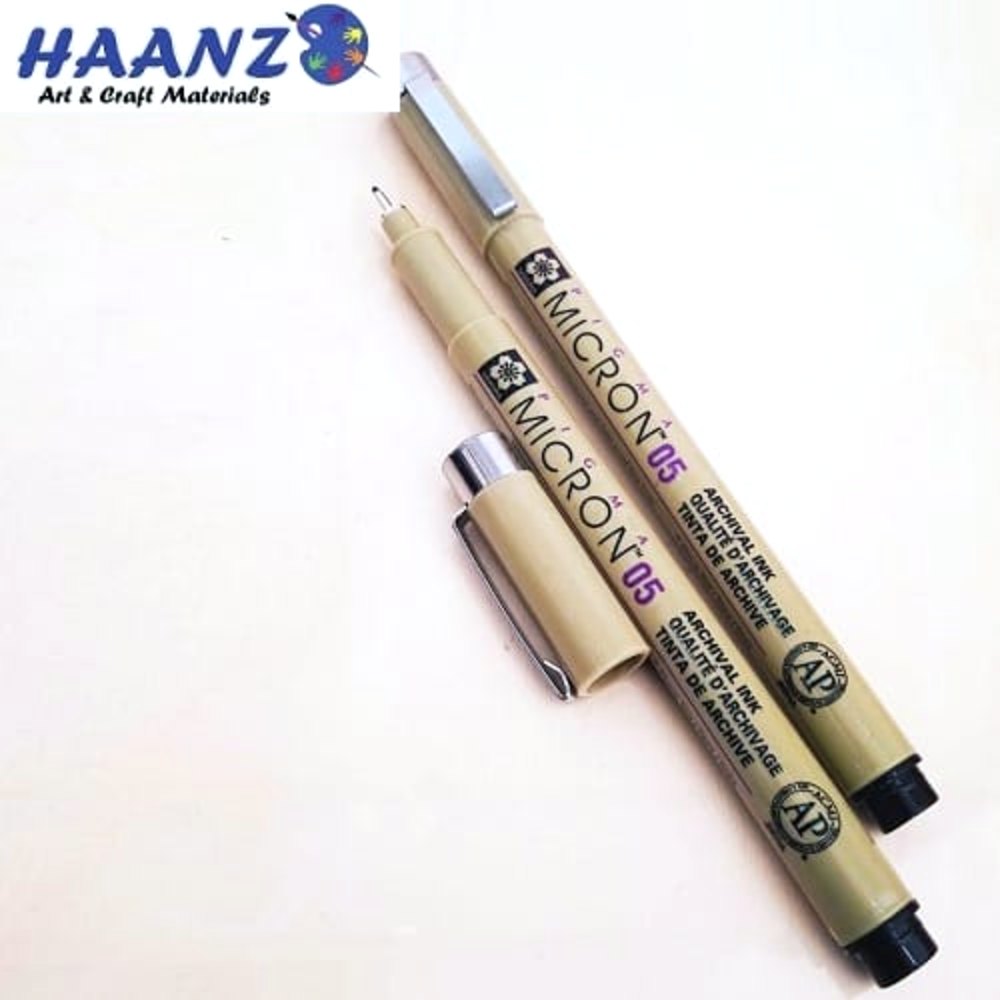
With a pen, you cannot smudge or blend like you can with a pencil. Instead, you build light and shadow with lines and dots. Hatching and cross-hatching, along with stippling, are the three main ways to shade in ink. This Haanz Art Guide explains each technique, the fineliner sizes to use, simple practice exercises and the common mistakes to avoid.
What you need
- Fineliners in a few sizes: the Sakura Pigma Micron range uses archival Pigma ink that is waterproof and fade-resistant. A useful starter trio is the Sakura Pigma Micron 003 (0.15mm) for fine detail, the Sakura Pigma Micron 01 (0.25mm) for most shading, and the Sakura Pigma Micron 05 (0.45mm) for outlines and darker areas.
- For bold darks: the Sakura Pigma Micron 08 (0.50mm) or the Sakura Pigma Graphic 1 with its 1mm line fill deep shadows faster.
- Paper: a smooth sheet keeps fine lines crisp. Try the Bomeijia Sketch Pad A4, 160gsm for practice and Fabriano Accademia Paper A3 200gsm for finished pieces.
- Pencil and eraser: sketch lightly first with an HB Camlin Drawing Pencil, then remove the pencil after the ink is fully dry with a Hauser Dust Free Eraser.
See all pens in Drawing Pens. Prices change, so see each product page for today’s price.
Hatching and cross-hatching explained
Hatching is a set of parallel lines drawn close together. Lines close together look dark. Lines far apart look light. You can also make lines thicker by using a bigger pen size.
Cross-hatching adds a second layer of lines at an angle over the first. Each new layer makes the area darker. A third and fourth layer, at different angles, give you very deep shadows.
Contour hatching is hatching that follows the curve of an object, like lines wrapping around an apple. It shows shape as well as shadow.
Stippling with fineliners
Stippling builds tone with many small dots. Dots close together read as dark, and dots spread out read as light. It is slow, but it gives a soft, smooth look that suits skin, stones, fruit and botanical drawing.
- Hold the pen straight up and tap lightly. Do not drag, or the dots become tiny dashes.
- Use a 003 or 005 size for soft areas and a 05 for the darkest parts.
- Work from light to dark. You can always add dots, but you cannot remove them.
Practice exercises step by step
- Make a tone scale. Draw a row of five boxes. Leave the first one white. Fill the others with hatching, getting darker each time by adding lines closer together.
- Repeat with cross-hatching. In a new row, use one, two, three and four layers of lines at different angles.
- Repeat with stippling. Fill five boxes with dots, from very sparse to very dense.
- Shade a sphere. Draw a circle in light pencil. Decide where the light comes from. Use contour hatching that follows the round shape, adding cross-hatching on the shadow side and a cast shadow under the ball.
- Try a simple object. Draw a mug, a fruit or a shoe from your home. Shade one using only hatching, one with cross-hatching, and one with stippling, then compare.
- Erase the pencil. Wait until the ink is completely dry, then erase gently.
Tips and common mistakes
- Keep a light hand. Pressing hard can damage the fine tip of a fineliner. Let the pen glide.
- Avoid hooks. Lift the pen at the end of each line so lines do not end with small hooks or blobs.
- Turn the paper. Your hand moves most easily in one direction, so rotate the page to keep lines even.
- Do not mix too many directions. Random lines look messy. Plan two or three angles.
- Cap your pens. In hot weather, an uncapped fineliner can dry out quickly.
- Leave white paper. Highlights are areas you do not touch, so plan them before you begin.
New to pens? Read Ink Drawing for Beginners and Sakura Pigma Micron Sizes Guide to choose your tip sizes.
Frequently asked questions
Which fineliner size is good for hatching?
A 01 (0.25mm) is a comfortable all-round size. Add an 003 or 005 for fine details and a 05 or 08 for outlines and strong shadows.
Can I add watercolour over my ink shading?
Pigma Micron ink is waterproof once dry, so you can add a light watercolour wash on suitable paper. Let the ink dry fully first and test on a scrap.
Do you deliver islandwide?
Yes. We deliver across Sri Lanka in 2–5 working days, with cash on delivery, card or bank transfer. You can also visit our shops in Boralesgamuwa and Horana, open every day from 9 AM to 6 PM.
Not sure what to choose? Call / WhatsApp the Haanz team on 0711 515 515 and we’ll help you choose fineliner sizes and paper for ink shading.
More Haanz Art Guides
 How to Stop Smudging Your Drawings: Gloves, Fixative and TipsRead the guide →
 Storing Art Supplies in Humid Weather: Keep Paper and Paint FreshRead the guide →
 White Gel Pens: How to Add Highlights to Your DrawingsRead the guide →
 Where to Buy Art Supplies Online in Sri Lanka: A Simple GuideRead the guide →
