

How to Make a Resin Wall Clock: Moulds, Numbers and Movement

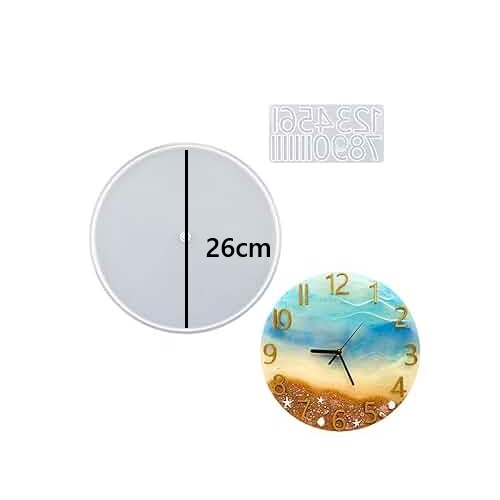
A resin clock is a showpiece project: a glossy clock face with swirling colours, flowers or gold flakes, plus a working movement. It makes a memorable gift for weddings, housewarmings and birthdays. This Haanz Art Guide explains the clock moulds, number moulds and clock movement we stock, and walks you through making a resin wall clock.
What you need
A clock face mould (choose one):
- Clock Mold and Numbers MD3550 + MD3322: a clock face mould with a matching numbers mould, for a complete clock with cast numbers.
- Clock Mold Without Numbers MD3547: a clock face for your own number design, or decoration with flowers and foil instead of numbers.
- Clock Mold: another clock face design. Check the photos for the shape.
Numbers (if your face mould doesn’t include them):
- Roman Numbers for Clock Mold MD3323: for raised Roman numerals on resin, wood or canvas clocks.
- Small Number Silicone Mold 9927982: small numbers for clocks, dates and plaques.
The movement:
- Clock Movement Machine with Arms: a battery-operated clock mechanism with hands, made to fit resin, wooden or canvas clock faces.
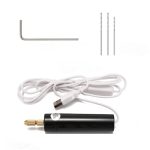
Drilling tools (if your face needs a centre hole): the Twist Drill Set with 2 Bits or the USB Power Mini Hand Drill with Bits.
You will also need resin, colours and a level surface. Prices change, so see each product page for today’s price.
Step by step
- Plan the design. Decide on colours and inclusions. Ocean waves, galaxy blues, pastel marble and pressed flowers are all popular.
- Measure the resin. Fill the face mould with water, measure it, then dry the mould completely.
- Pour the clock face. Mix and colour the resin, pour slowly, add inclusions and pop bubbles. Cover to keep dust off.
- Cast the numbers at the same time in the number mould, in a contrasting colour such as gold or white.
- Cure fully before demoulding. Large faces need the full curing time.
- Make the centre hole if your mould doesn’t create one. Measure the movement’s shaft, then drill slowly from the front.
- Fix the numbers in place with a little resin or strong glue. Use the hour positions as a guide: place 12, 3, 6 and 9 first, then fill in the rest.
- Fit the movement from the back, push the shaft through, add the washer and nut on the front, then press on the hour, minute and second hands in order.
- Add a battery, set the time and hang your clock.
Design ideas
- Ocean clock: blue and turquoise resin with white “foam” lines.
- Floral clock: a clear face with pressed flowers around the edge.
- Galaxy clock: deep blue and purple with white dots and silver flakes.
- Minimal clock: one soft colour with gold Roman numerals.
See How to Colour Resin and Dried Flowers in Resin for techniques.
Tips for a clock that works well
- Keep the face flat and level while curing, or the hands may rub.
- Make sure the hands have space to turn and don’t touch raised numbers.
- Check the shaft length fits the thickness of your clock face.
- Hang the clock on a sturdy hook, as resin faces can be heavy.
Frequently asked questions
Can I put the movement in a wooden or canvas clock?
Yes. The clock movement fits resin, wooden or canvas clock faces.
My hands catch on the numbers. What can I do?
Use flatter numbers, place them further from the centre, or space the hands out on the shaft.
Do you deliver islandwide?
Yes. We deliver across Sri Lanka in 2–5 working days, with cash on delivery, card or bank transfer. You can also visit our shops in Boralesgamuwa and Horana, open every day from 9 AM to 6 PM.
Not sure what to choose? WhatsApp the Haanz team on 0711 515 515 and we’ll help you plan your resin clock.
More Haanz Art Guides
 Fabric Painting for Beginners: Paints, Markers and SpraysRead the guide →
 Drilling, Sanding and Polishing Resin: Tools and TipsRead the guide →
 Sable Brushes Explained: Round, Flat and FilbertRead the guide →
 Mechanical Pencils, Leads, Sharpeners and Pencil ExtendersRead the guide →
