

Botanical Watercolour: How to Paint Flowers and Leaves

Flowers and leaves are perfect subjects for watercolour: soft edges, glowing colour and endless variety, right outside your door. This guide to botanical watercolour explains how to observe and sketch plants, paint simple leaves and flowers step by step, mix natural greens, and which papers, paints and brushes to use.
Start by observing
- Pick a real leaf or flower, such as a hibiscus, frangipani (araliya) or a single leaf, and look closely before painting.
- Notice the overall shape, where it is lightest and darkest, and how veins and petals curve.
- Count petals and notice how they overlap.
- Lightly sketch the main shapes with an HB pencil. Keep lines faint; heavy pencil shows through watercolour.
Mixing natural greens
- Mix your own greens rather than using green straight from the tube: yellow + blue gives a range of greens.
- Add a touch of red or brown to tone down bright greens for older leaves.
- Use more yellow for young, sunlit leaves and more blue for shadowed ones.
- Make several greens in your palette before you start, so the leaves vary naturally.
Our colour mixing guide explains why some greens look brighter than others.
How to paint a simple leaf
- Sketch the leaf outline and the central vein.
- Wet one half of the leaf with clean water, staying inside the outline.
- Drop in a light green, then a darker green near the edge or base, and let them blend.
- Repeat on the other half once the first is dry, so the central vein stays as a thin light line.
- When dry, add a few darker side veins with a fine round brush.
How to paint a simple flower
- Sketch the petals lightly around a small centre.
- Paint each petal with a light wash of colour, adding a stronger drop of the same colour near the centre while wet.
- Leave tiny gaps of white paper between some petals to keep edges crisp.
- Paint every other petal first and let them dry, so neighbouring petals don’t bleed together.
- Add the centre, stem and leaves, then deepen shadows where petals overlap with a second, darker glaze.
Supplies for botanical watercolour
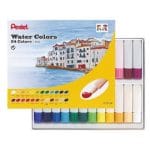
- Paint: Pentel Watercolour 24 tubes or Camel Watercolour Cakes 12.
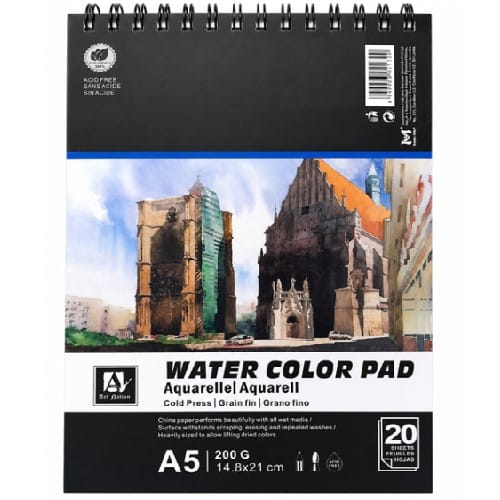
- Paper: the Art Nation Watercolour Pad A5 for studies or the Bomeijia Watercolour Pad A4.
- Brushes: a fine-pointed round such as an Apple Fine Red Sable size 2 and a size 6 for washes, or a Sakura water brush for painting outdoors.
- Optional line work: a waterproof fineliner such as the Sakura Pigma Micron 01, once the paint is dry or before painting. See our Micron sizes guide.
Prices change, so see each product page for today’s price. For more watercolour basics, see our watercolour techniques guide. Browse all watercolours.
A sketchbook of plant studies, one leaf or flower per page with its name and the date, is a lovely way to practise and to record the plants around your home or garden through the year.
Tips
- Work from light to dark; you can add darker layers but can’t easily make areas lighter.
- Let each layer dry fully before adding details.
- Paint the same flower several times; each version gets better.
- Press a flower in a book to keep a reference that won’t wilt.
Frequently asked questions
Can I paint from photos?
Yes, but real plants show colour and form more clearly. Use photos for flowers that fade quickly.
Why do my petals run together?
Neighbouring areas were both wet. Paint alternate petals and let them dry first.
Which paper is good for flowers?
Watercolour paper of 160gsm or more. Heavier paper takes more layers without buckling.
Do you deliver islandwide?
Yes. We deliver across Sri Lanka in 2–5 working days, with cash on delivery, card or bank transfer. You can also visit our shops in Boralesgamuwa and Horana, open every day from 9 AM to 6 PM.
Not sure what to choose? WhatsApp the Haanz team on 0711 515 515 and we’ll help you choose watercolour supplies for flower painting.
More Haanz Art Guides
 Mixed Media Art for Beginners: Materials, Layers and IdeasRead the guide →
 Watercolour Paints for Beginners: Tubes vs Cakes and Best SetsRead the guide →
 Oil Painting Brushes: Bristle, Sable and Synthetic ExplainedRead the guide →
 Resin Safety: How to Work with Epoxy and UV Resin SafelyRead the guide →