

How to Make Resin Coasters: A Step-by-Step Beginner Project


Resin coasters are the perfect first resin project. They are small, useful, look beautiful with colour, shimmer or dried flowers, and make lovely handmade gifts. This guide explains how to make resin coasters with epoxy resin, from setting up your table to demoulding and finishing.
Resin coasters: what you need
- Epoxy resin: a 1:1 resin such as FUJIN 1:1 Crystal Clear Epoxy Resin 100ml + 100ml is easy to measure by volume and enough for a few coasters. For bigger batches, choose the 500ml + 500ml size.
- Coaster mould: a flexible silicone mould such as the Flower Coaster Mould (9926926).
- Mixing cups and tools: reusable Silicone Cups and the Epoxy Resin Tools set for measuring, mixing and pouring.
- Colour: Mica Powder Bottle 10g for shimmer, Alcohol Ink 10ml for cells and effects, or Bicolor Glitter Powder.
- Inclusions: Dry Flowers (Small) for a natural look.
- Safety: disposable gloves, a covered table and good ventilation.
Prices change, so see each product page for today’s price. New to resin? Start with our resin art for beginners guide.
Prepare your workspace
- Work on a level table covered with plastic sheet or baking paper.
- Choose a well-ventilated, dust-free room, away from children, pets and food.
- Make sure the mould is clean and completely dry; water causes cloudy patches.
- Have everything ready before you mix, because epoxy has a limited working time.
How to make resin coasters, step by step
- Measure: pour equal volumes of resin and hardener into a cup, exactly as the label directs.
- Mix: stir slowly and thoroughly, scraping the sides and bottom, for the time the label recommends. Slow stirring means fewer bubbles.
- Colour: split the mix into smaller cups and add a little mica or a few drops of alcohol ink to each. A small amount goes a long way.
- Pour: pour a thin first layer into the mould. Place dried flowers face down if you want them to show on the top.
- Top up: pour the rest to fill the mould. Gently pop surface bubbles with a toothpick.
- Cover and cure: cover the mould with a box to keep dust out and leave it on a level surface for the full cure time on the label.
- Demould: once fully hard, flex the silicone and push the coaster out.
Finishing touches
- Sand any sharp edges lightly with fine sandpaper, wearing a mask.
- Stick felt or cork pads on the back to protect tables.
- Paint the edges with metallic paint for a gilded look; see our metallic paint guide.
- Make a matching set of four or six and tie with ribbon for a gift.
Design ideas
- Ocean coasters: blue and white layers with a touch of shimmer.
- Pressed flower coasters: clear resin with dried flowers.
- Geode style: bold colour with glitter and a metallic edge.
- Marble: white base with thin swirls of black or grey alcohol ink.
For more colour ideas, read how to colour resin.
Caring for resin coasters
Wipe them clean with a damp cloth and mild soap. Avoid placing very hot pots or pans directly on them, as strong heat can mark or soften resin. Keep them out of strong sunlight for long periods.
Frequently asked questions
Why are my coasters sticky?
Usually the resin and hardener were not measured or mixed correctly. Measure exactly and mix thoroughly, as the label directs.
How many coasters can I make?
It depends on the mould size. Measure how much water fills one cavity, dry the mould fully, then mix that amount of resin.
Can I use UV resin for coasters?
UV resin suits thin layers and small pieces. For thicker coasters, epoxy resin is usually the easier choice.
Do you deliver islandwide?
Yes. We deliver across Sri Lanka in 2–5 working days, with cash on delivery, card or bank transfer. You can also visit our shops in Boralesgamuwa and Horana, open every day from 9 AM to 6 PM.
Not sure what to choose? WhatsApp the Haanz team on 0711 515 515 and we’ll help you choose resin and moulds for coasters.
More Haanz Art Guides
 Starting Art as an Adult: A Friendly Guide for Late BeginnersRead the guide →
 Craft Materials for Kids: Foam, Felt, Pipe Cleaners and MoreRead the guide →
 Paper Craft Tools: Scissors, Punches and Cutters ExplainedRead the guide →
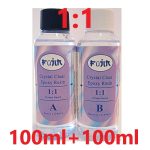 Resin Problems Solved: Bubbles, Sticky, Cloudy and MoreRead the guide →