

Drilling, Sanding and Polishing Resin: Tools and Tips


Pouring is only half of a resin project. Drilling resin for keychains and pendants, sanding rough edges and polishing back to a shine are what make a piece look professional. This Haanz Art Guide covers the finishing tools we stock and the simple steps to use them safely.
Drilling tools
USB Power Mini Hand Drill with Bits Pack. A compact, USB-powered drill with a pack of bits for small, neat holes in resin, wood and shells. Good when you drill a lot of keychains and pendants.
Twist Drill Set with 2 Bits and Accessories. A hand-powered twist drill that needs no electricity and gives precise control. Ideal for occasional drilling and for beginners, because it is slow and easy to guide.
5V, 1A Power Adapter. A compact USB power adapter for USB tools and lights, such as mini drills and UV lamps.
Sanding and polishing
Electric Polishing Kit with Bit Pack. An electric tool with a pack of bits for sanding, smoothing and polishing the edges of resin pieces. It removes drips and sharp edges much faster than sanding by hand.
Work surface helpers
- Silicone Mat: a flexible, reusable silicone surface. Cured resin peels off easily, so it protects your table.
- Silicone Spatula: for stirring and scraping resin. Cured resin peels off silicone, so the spatula can be reused.
- Plastic Container Box: keeps small findings, bits and inclusions organised.
Browse more in Other Resin Materials. Prices change, so see each product page for today’s price.
How to drill resin
- Wait until the resin is fully cured. Soft resin tears instead of drilling cleanly.
- Mark the spot with a fine marker. Keep it at least a few millimetres from the edge so the piece doesn’t crack.
- Hold the piece firmly on a scrap block of wood, not in your hand.
- Drill slowly and straight, letting the bit do the work. Stop now and then to clear dust.
- Finish the hole by turning the bit gently to smooth the edges.
Many makers drill pendant and keychain holes after curing, because a drilled hole lets you choose the exact position.
How to sand and polish
- Remove sharp edges and drips with the electric polishing kit on a low setting, or by hand with sandpaper.
- Wet-sand with progressively finer sandpaper if you need a very smooth finish. Water keeps dust down and stops scratches.
- Restore the shine. Sanded areas look cloudy. Brush a very thin layer of resin over them, or polish with a fine polishing bit.
- Clean the piece with a soft, lint-free cloth.
Safety
- Wear a dust mask when drilling or sanding resin. Resin dust should not be breathed in.
- Wear safety glasses to protect your eyes from chips.
- Work in a well-ventilated area and clean dust with a damp cloth, not by blowing.
- Keep tools away from children.
Read Resin Safety for full guidance, and Resin Tools and Accessories for mixing cups, sticks and more.
Which tool to start with?
- A few keychains a month: the twist drill set and sandpaper.
- Regular jewellery making or selling: the USB mini drill plus the electric polishing kit.
- Every resin maker: a silicone mat and spatula.
Frequently asked questions
Can I drill UV resin pieces?
Yes, once they are fully cured. Thin UV pieces are delicate, so drill gently.
Why did my piece crack when drilling?
The hole was too close to the edge, the resin wasn’t fully cured, or too much pressure was used. Go slowly and leave a margin.
Do you deliver islandwide?
Yes. We deliver across Sri Lanka in 2–5 working days, with cash on delivery, card or bank transfer. You can also visit our shops in Boralesgamuwa and Horana, open every day from 9 AM to 6 PM.
Not sure what to choose? WhatsApp the Haanz team on 0711 515 515 and we’ll help you choose finishing tools.
More Haanz Art Guides
 Bronze and Copper Metallic Acrylics: Warm Metal EffectsRead the guide →
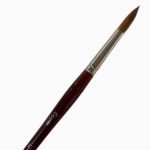 Sable Brushes Explained: Round, Flat and FilbertRead the guide →
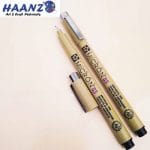 Sakura Pigma Micron Pen Sizes Explained: Which Tip to ChooseRead the guide →
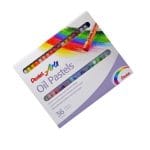 Starting Art as an Adult: A Friendly Guide for Late BeginnersRead the guide →
