


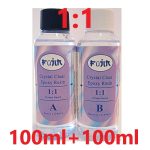
FUJIN 1:1 Crystal Clear Epoxy Resin 50ml+50ml
Rs. 690.00
- 1:1 Mixing Ration
- Volume Based (Measure and Mix)
- High Gloss
- 40 Minute Work Time
- Resists Yellowing
- Self Leveling
- No VOCS
- Low Odor
- Non Flammable
Out of stock
1:1 Volume Based, Crystal Clear Epoxy Resin
1 to 1 on Volume Jewelry Making Crystal Clear Hard Resin
50ml Resin + 50ml Hardener = 100ml
INSTRUCTIONS
The epoxy by Fujin 1:1 is a 2-part Epoxy Resin perfect for coating countertops and bars, molding coasters and jewelry, preserving paintings and photographs, and as an all-purpose glue. It will dry in 8 hours at 75°F, and will fully cure in 72 hours to produce a durable, high-gloss finish that’s clear as glass. Please read the instructions carefully and follow the recommended safety measures.
NOTE:Fujin 1:1 Epoxy Resin has a shelf life of 6 months when stored tightly sealed in a cool, dry place
SETUP:
Getting Ready:
Make sure the surface you want to coat is clean, dust-free, and level.
MOLDS: For jewelry and similar applications, we recommend using silicone molds. A mold-release spray may be used, but is not necessary with silicone molds. Very deep molds should be filled with a single pour when possible, as slight clouding can develop between several thick layers.
EMBEDDING OBJECTS: Porous materials (corks, shells, coins, etc.) can release bubbles into the resin and will first need to be covered with a thin seal coat of epoxy. Make sure this seal coat has dried for at least 4 hours before embedding your objects in resin or adding a flood coat. Remember to glue down any objects you’d like to embed – if it’s too light it will float to the surface. You can use white craft glue to preserve paper, photographs and fabric before coating them with resin. Use a flat scraper to push air bubbles out from under the surface, and make sure the glue is completely dry before coating with epoxy. Note that materials like paper, fabric, and synthetic flowers can turn translucent or change color under epoxy. Perform a spot-test to see how the materials you plan to embed will react.
WOOD: Most wood projects should first be sanded down and cleaned with acetone or rubbing alcohol. Please note that moisture, grease, and uncured finishes on the wood can prevent the resin from curing properly. Raw wood can be porous and will require a thin “seal coat” to prevent bubbles from escaping into your second, thicker “flood coat”. The seal coat can be 1/16-1/8 in. thick and will need to dry for a minimum of 4 hours before the second coat is added. Clean the surface of the seal coat with acetone before adding your flood coat. If the surface you are coating does not have a rim, the resin will flow over to coat the edges. You can dam the edges by using masking tape or strips of hard plastic to create a temporary barrier. For bars and countertops, drips from the edges can be removed with a razor when the resin has solidified but not yet cured. If the resin has cured, edges can be sanded down by hand or with a sanding attachment on a drill.
1 MIXING
NOTE: When figuring out how much resin you need to mix, consider that some projects will require two coats – a seal coat (to cover porous surfaces) and a flood coat (to achieve a perfect finish).
- Resin (A) and Hardener (B) should be mixed at a 1:1 ratio by volume. Getting the measurement right is the most important factor for the outcome of your project.
- Measure equal parts resin and hardener into two measuring cups, and then pour both into a third container to mix.
- Stir the resin and hardener for 4-6 minutes – consider using a timer, it’s longer than you think! Be sure to thoroughly scrape down the sides and bottom of your container.
- Tip: Try not to lift your stirring stick while you mix, as this can whip the resin and introduce more air bubbles.
- You can expect to see streaks, bubbles, and cloudiness as you mix – this is a normal part of the chemical reaction and your resin will turn clear as it cures.
- The average work-time for your mixed resin is 45-60 minutes. Mixing in large quantities will shorten your work-time, as will a higher room temperature. Leaving your mixed resin in the container will speed up the chemical process, and the resin will set quickly.
- After mixing, you can add a non-water based dye or glow pigment to your resin for a custom finish. Dyes and additives should be no more than 5% of your mixture (by volume).
2 POURING
NOTE: Don’t wait to pour your mixed epoxy. If left in the mixing container, the resin will cure and harden quickly. Do not scrape the sides or bottom of your mixing container when you pour – this will prevent any unmixed resin clinging to the sides of your container from damaging your finish.
- Slowly pour the mixed resin onto your surface. The resin will self-level to 1/16 in, but you can make each layer as thick as ¼ in. A thicker pour than ¼ in. may warp, shrink, cloud, or discolor the resin.
- You can use a scraper or squeegee to help spread the resin over a large surface, and a disposable nylon or foam brush to coat corners and edges.
- In some cases, you may need to apply several coats of resin:
for example, when you are covering a porous surface, when your wood has deep grooves that need to be filled, when you want a final thickness greater than ¼ in., when you want to embed objects, or when your mold is deeper than 3 fluid ounces. Allow for a 4 -10 hour cure time between coats.
- Tip: If your coat has cured more than 24 hours, it will have to be sanded lightly and cleaned with acetone or rubbing alcohol before a new coat can be applied.
3 BUBBLES
- This resin is self-degassing: air bubbles will appear as a natural part of the chemical process, and most of them will pop by themselves.
- 5-10 minutes after pouring, you can remove bubbles by gently blowing on the surface using a straw.
- REMOVING BUBBLES : A heat gun or blow torch (on a low-flame setting) can be used to remove any remaining bubbles. Hold the blow torch 6-8 inches from the surface and sweep in a slow motion across the top, taking care not to burn or discolor the resin. You can repeat this process as many times as necessary while the resin is still wet.
4 CURE
NOTE: In normal conditions, the resin should be dry to the touch after 8 hours, cured after 24 hours, and reach full hardness after 72 hours.
- The number of resin layers, room temperature, humidity and altitude can all affect curing time.
- After applying your final coat, leave your project to cure in a dust-free space. You can cover your work with a cardboard box or an elevated drop cloth to keep dust from landing on the surface.
- Keep in mind that resin may warp if exposed to temperatures above 120°F. Avoid putting very hot cups or plates directly onto cured resin without a coaster. Do not wash your project in the dishwasher or using very hot water.
- Bars/Tabletops: The resin will harden fully within 2-3 days, but we suggest waiting a week before using the surface, as some light scratching may still occur within the first week.
- Molds: We recommend waiting until the resin has fully cured before unmolding your project.
Outdoor use: While Ministry Of Crafts Epoxy Resin is formulated to resist yellowing, all epoxies eventually acquire a slight yellow tint after prolonged UV exposure. Consider using a UV resistant acrylic topcoat if your project is intended for outdoor use.
TROUBLESHOOTING
The resin has not cured after 72 hours.
This can happen if the resin was under-mixed or measured inaccurately. If only some spots are wet or sticky: Scrape out the uncured resin where possible, apply a new coat to fill the gaps, allow to set for 6-10 hours, and cover the entire project with a flood coat.
If the entire surface is wet or sticky: Scrape off as much as possible with a razor or paint scraper. Wipe down with denatured alcohol and recoat. If the surface is hard, but not fully cured: Apply another flood coat. Be sure to measure and mix accurately.
The cured resin has an uneven surface.
This can happen if the coated material was warped or porous, or if a
heat gun/blow torch was used too close to the surface. Applying a
new flood coat should mask any imperfections from the previous coat.
The cured resin has too many air bubbles.
This can happen if porous surfaces or embedded materials were not covered with a seal coat, if the resin was whipped during mixing, or if surface bubbles were not removed with a blow torch or heat gun.
Sand down the resin to remove bubbles and recoat.
SAFETY: Fujin 1:1 Resin is formulated to be non-toxic and virtually odorless. For your own safety, we recommend wearing rubber gloves and protective eyewear when handling epoxy. Work in a well-ventilated area. Store container tightly sealed and in a cool, dry place. Keep out of reach of children and pets. Avoid skin contact, eye contact, inhalation or ingestion. In case of skin contact: remove contaminated clothing and wash affected area with mild soap and water for 15 minutes. In case of eye contact: remove contact lenses if necessary, and flush with lukewarm water for 15 minutes. In case of ingestion: call a physician immediately. Since conditions of the use of this product are outside our control, we cannot assume liability for results obtained or damage incurred due to misuse.